Quantcast
Channel: Sandstorm's Blog (Home of ssUltimate Library)
Viewing all 160 articles
Browse latest View live

Tick/Untick a checkbox on Grid with AllowCellSelection = .F.

$
0
0
Normally, when we want to put a checkbox on grid for the purpose of ticking and unticking it, then most probably most of you do it this way:


  • Set AllowCellSelection = .T.
  • Drill to every textbox object inside each columns and put under When method Return(.f.).  That is to prohibit the cell in getting focus


An alternative way is to set AllowCellSelection = .F. and use grid's double-click on toggling the value of the logical field bound to that checkbox, then perform a grid refresh


While any of the two will work, I will be showing here an alternative to that where the Grid's AllowCellSelection will still be set to .F. disallowing individual objects inside to receive a focusyet will allow you to click on the checkboxas if the checkbox can really be selected.

The trick is really simple.  Here are the codes:

Local oForm
oForm=Newobject("Form1")
oForm.Show
Read Events
Return

Define Class Form1 As Form
      Height = 460
      Width = 500
      AutoCenter = .T.
      Caption = 'Ticking Checkbox on Grid with AllowSelection = .F.'
      ShowTips = .T.

      Add Object grid1 As Grid With ;
            GridLines = 0, ;
            Height = 400, ;
            Left = 10, ;
            Top = 50, ;
            Width = 490,;
            GridLines = 3,;
            DeleteMark = .F.,;
            ScrollBars = 2,;
            ColumnCount = 3,;
            AllowCellSelection = .F.


      Add Object label2 As Label With ;
            top = 10,;
            left = 15,;
            Height = 36,;
            caption = 'This is a simple trick on allowing the checkbox object to be ticked even though '+;
            "the grid's AllowCellSelection is set to .F.  The trick is on MouseDown",;
            WordWrap = .T.,;
            Width = 570

      Procedure Load
            Close Databases All
            Select .F. As xSelect, cust_id, company From (Home(2)+"data\customer") Into Cursor junk Readwrite
      Endproc

      Procedure grid1.Init
      With This
            .RecordSourceType = 1
            .RecordSource = 'junk'
            .Column3.Width = 360
            With .Column1
                  .AddObject("check1","checkbox")
                  .CurrentControl = "check1"
                  .Sparse = .F.
                  .check1.Caption = ''
                  .check1.Visible = .T.
                  .check1.BackStyle=0
                  .Width = 20
            Endwith
            .SetAll('DynamicBackColor','IIF(xSelect,RGB(128,255,0),RGB(220,228,211))','Column')

      Endwith
      Endproc

      Procedure grid1.MouseDown
      Lparameters nButton, nShift, nXCoord, nYCoord
      Local lnWhere, lnRelRow, lnRelCol
      This.GridHitTest(m.nXCoord,m.nYCoord,@lnWhere,@lnRelRow,@lnRelCol)
      If m.lnRelCol = 1
            Replace xSelect With !xSelect In junk
            This.Refresh
      Endif
      Endproc

      Procedure Destroy
            Clear Events
      Endproc

Enddefine


Said trick will give the grid an illusion that there are two groups, i.e., 1st is the checkbox and the 2nd is the rest of the columns.  And for those new with Grid Dynamic Properties as well, just to highlight the selected (ticked) records, I use DynamicBackColor here.

Hope you'll find this useful! Cheers!

TitleBarX Class

$
0
0
Note:  Sorry about the earlier link. It appears the rar is broken (I did not check).  Here now is the latest link:

https://dl.dropboxusercontent.com/u/15025358/titlebarx.rar

Here is the latest among my toys which is part of ssUltimate class.  This new TitleBar class is very unique against what is already around the web


What makes this unique?

Well for one, I can say this is unique in the sense that this allows users to change color of the titlebar class on-the-ply, and retain it.

It allows two captions, One Main and one sub

It has a built-in unique dropdown color picker

The control box is a series of shapes so it is cleaner

Embedded a cool looking mouse pointer inside


This is my first release of this class.  I will add some more features in the future

Especial thanks to Cesar Chalom for the function to convert colors he posted on Weblogs which allows me to calculate the shades I want for lower shape, border and controlbox:  http://weblogs.foxite.com/vfpimaging/2006/11/27/function-to-convert-colors/

Especial thanks to Cesar Chalom and Cetin Basoz for the color picking sample:  http://weblogs.foxite.com/vfpimaging/2008/01/17/a-great-color-picker/


How to use this class


  • Drop into your form
  • Change MainCaption property.  If you leave it blank, it will pick-up the caption of the form
  • Add a sub-caption (optional)
  • You can toggle showing Clock ON and OFF via NoClock property (default is .F.)
  • You can toggle The glow effect on Captions into ON and OFF via NoGlow property (default is .F.)
  • You can make it look flat via the FlatLook property (default is .F.)
  • When Dropdown Picker is open, these are the actions you can do:
    • Move around the mouse pointer on the palette to pick a color.  Those will be reflected back on the class itself (titlebar, controlbox, border, shade)
    • Click on a color to stop picking.  Click again to resume picking
    • Change shade of selected color via the spinner object
    • Click outside to finalize and hide the palette form
  • Allowed developer to use the class BackColor to change color of other objects on the form on the ply as well.  Later I will add the capability to control shades of those.

I did enjoyed working on this these last few days causing me to temporarily abandon enhancements on xBox class and I hope you will find this not only useful but enjoyable as well.  Cheers!

Accurate Age Calculator

$
0
0

I never gave thought to calculating an age of a person in terms of years, months and days. But since I read a thread in Foxite pertaining to such need, then I decided to find out how hard it really is.  And it really is not simple as problems appear in months and days.

Anyway, I always try to think beyond the box meaning I do not limit my tools from within VFP itself so I realize a way to do that easy is via automation using Excel.  Excel has this cool function called DATEDIF to get an accurate difference between years, months and days.  So that is where the experiment went.  And here it is:

Public oAge
oAge = Createobject('EMPTY')
AddProperty(oAge,'Year',0)
AddProperty(oAge,'Month',0)
AddProperty(oAge,'Day',0)

Create Cursor junk (Person c(10),birthdate d, enddate d, nYear I, nMonth I, nDay I)
Insert Into junk Values ('Jun',Date(1971,7,13),Date(),0,0,0)
Insert Into junk Values ('Rolly',Date(1952,9,21),Date(),0,0,0)
Insert Into junk Values ('Whoever',Date(2012,6,11),Date(),0,0,0)
Insert Into junk Values ('Baby 1',Date(2014,8,3),Date(),0,0,0)
Insert Into junk Values ('Baby 2',Date(2014,12,29),Date(),0,0,0)

* Create an Excel file
Local loExcel As excel.Application
loExcel = Createobject('excel.application')
With loExcel
      .Workbooks.Add()
      .DisplayAlerts = .F.
Endwith
Scan
      GetAge(birthdate,enddate,loExcel)
      Replace nYear With oAge.Year, nMonth With oAge.Month, nDay With oAge.Day
ENDSCAN

loExcel.Quit
Browse Normal

******
Function GetAge(dBirth, dEnd, loExcel)
*****
With loExcel
      .Cells(1,1).Value = m.dBirth
      .Cells(2,1).Value = m.dEnd
      .Cells(4,1).Value = '=DATEDIF(A1,A2,"Y")'
      .Cells(5,1).Value = '=DATEDIF(A1,A2,"YM")'
      .Cells(6,1).Value = '=DATEDIF(A1,A2,"MD")'
      oAge.Year = .Cells(4,1).Value
      oAge.Month = .Cells(5,1).Value
      oAge.Day  = .Cells(6,1).Value
Endwith
Return


Quite simple, isn't it?  Cheers!

xBox with Popup Grid

$
0
0
Updates 2/7/2015

1.  Down arrow now works good.  Once you press down arrow, it now goes to the grid where you can use arrows to navigate through records.  If you want to finalize selection, press enter, double-click or click outside of the popup grid.

2.  Works on Modal form now (I was informed earlier by Bryan Gerlach inside the forum that it is not clickable on modal forms)

- Redownload demo form

Updates 2/6/2015

Fixed some problems mentioned by MK and Alejandro inside Foxite forum, plus those reported to me by my users. Added also 5 more features:

1. _nCaptionAlign - where we can change alignment of the inner caption. This works useful when if you want to retain the caption even when the class has a value via _retainCaption = .T..  When you position it on right alignment (1), then when the class looses focus, if the class has a value it will position itself on the right.  If the class remains empty of value, then it will position itself on the left.

2. Shown titlebar of popup form and added Near Matches result as its caption (taking ideas from Ali Koumaiha's popup grid)

3.  Added lNoTitleBar parameter in _SetGrid().  That is if others are not comfortable with a form looking popup with titlebar and border, all you need to do is pass .T. onto that and the titlebar will be hidden again (#2 above)

4.  Added _Clear method.  That is to make clearing both the value and extravalue in one go.  Plus that also takes care of resetting SelStart and SelLength of the class. So instead of doing these:

This.xbox1.Value = ''
this.xbox1.ExtraValue = 0

All you need to do now to allow it for new entry is:

This.xbox1._clear()

5.  I realized just now with the recent exchanges with MK inside the form that I never mentioned that Double-Clicking the class will clear it up for a fresh entry.  I now also have updated tooltiptext to include that information.  And as for ToolTipText of the class, you can type your own ToolTipText and now those two mandatory information about the double-click and right-click context will automatically be added onto your own ToolTipText.

Image of number 1 and 2 above:

Updates 2/5/2015

* Minor Update

·      Added _RetainCaption property (Default is .F.).  When you set this to .T., even when the class has a value, the caption will remain
·         Changed the icon for marker 3 (search icon) to something more appealing to me


* Major Update

Added Popup Grid
This one is a bit tricky and honestly has taken a lot of my time.  Anyway, I won't bore you anymore with details and just run you down on the necessities.


How to Set the Popup Grid for PopUp feature

On INIT event of the class, you have to set the grid appearance.  But first you have to issue DODEFAULT() as that will run all the necessary codes I put in the init event of the class.  Next is to call _SetGrid Method

DODEFAULT()
this._setgrid('Customer Name-260|Address-200|City-100',2,585,250,2,'Calibri',11)

_SetGrid Method Parameters

Lparameters cColumnList, nScrollBar, nWidth, nHeight, nGridLines, cFontName, nFontSize

Where:

·         cColumnList - Controls the captions of the headers of each column.  As you can see on the sample code above, it has two delimiters, i.e., dash and pipe sign.
o   Pipe Sign ( | ) - is used by the class to break between the captions
o   Dash Sign ( - ) - is used by the class to determine the width of the column
·         nScrollBar- is a numeric representative of the ScrollBars property of Grid (Default is 3 or both scrollbars are shown)
·         nWidth- is the width of the popup grid (default is the same wide as the class instance on form)
·         nHeight- is the Height of the popup grid (default height is 100)
·         nGridLines - controls the horizontal and vertical lines the way it is controlled natively on Grid (default is 3)
·         cFontName- is the font to be used on grid (default is Arial)
·         nFontSize- is the size of font on grid (default is 9)

How to Perform a Popup Grid filtering

Use the InteractiveChange event of the class so the search/filtering is made as you type

*InteractiveChange Event
Local lcSQL
TEXT TO lcSQL NOSHOW PRETEXT 12
Select distinct to_name, to_address, to_city, cust_id From orders;
      where [MySearch]  $ to_name;
      ORDER By 1;
      GROUP BY 1,2,3,4;
      into Cursor junk NOFILTER
ENDTEXT
This._searchgrid(STRTRAN(m.lcSQL,';',''),'junk.to_name','junk.cust_id')

You can perform any SQL SELECT you want but this is mandatory:  WHERE [MySearch] $  OR WHERE 'MySearch' $ OR WHERE "MySearch" $.  Or you can use instead the SQL LIKE instead.  What you have to keep in mind is that [MySearch] holds the values of your keystrokes which is the basis of the class.

MySearch is not case sensitive but the class needs to see the exact mysearch word.

- Single click on popup grid will seed the class with .Value and .ExtraValue
- Double-click will seed and close popup grid
- You can use the class marker to show/hide popup grid as long as the current value of class is not empty.

Gotcha

I would like down arrow to set focus on the popup grid but this shortcircuits my class so I simply hide the popup form on enter and down arrow, for now.

Anyway, this is open source so I am hoping some of you guys can help make it better. I am sharing this now as I need to focus back on my office job.  I tried my best to make its usage simple and I hope I have not disappointed you guys!

For other features and usage of the class, refer to my first post here: http://sandstorm36.blogspot.com/2014/12/xbox-textbox-control-class.html

Special thanks to:

Tom Knauf for advising me to work on popup grid and sharing ideas as well.

Ony Too - for sharing us the DatePicker class which is a great help on my learning further about popup forms and control classes.

MK Sharma - for testing the class and informing me of bugs.

 Again, here is the demo project and library:  https://dl.dropboxusercontent.com/u/15025358/xbox_demo.rar

Chrome inside VFP Form

$
0
0
Update February 18, 2015:

This is getting interesting.  I suddenly thought maybe Chrome allows parameters to be passed and indeed there are, tons of it.   Here are the switches:

http://peter.sh/experiments/chromium-command-line-switches/

As for forcing Chrome to open on a new window instead of the existing one as a tab, it is --new-window

I also updated the sample below to know whether the operation is successful or not so it won't accidentally open any other active window aside from our target.

Later:

Paul Hemans post inside Foxite Forum while working on another approach using the --app switch of Chrome, gave me another idea on how to fix our problem with the titlebar.  And you'll be surprised that the trick of getting rid of that internal pesky not so good (in this case) Chrome's own titlebar is really very simple. All we need to do is move the chrome up from within our form that its own internal titlebar cannot be seen anymore, and thus rendering it likewise immovable.  LOL!

Check again the codes below, adjust lnMove value based on how you set up your Chrome on your end.  Since in mine I show my bookmarks, then my adjustment is 100.  Maybe on the link I gave above on the command switches, there are commands to hide those, but I did not check anymore. :)

======

Sparked by last week's thread inside Foxite Forum about placing an IE Browser inside VFP Form, I thought to myself it would be cool to put Google Chrome inside our form for a change.

Also, this will ensure that most probably a webpage can be displayed properly being Chrome is always up to date with changes introduced now and then, as compared to IE that has been left far behind and is giving developers now some headache to fix it via Registry tweaks.


Googling does not give me any result on how this new sudden thought of mine can be done as I never found any that shows how to achieve this without downloading and working on extension designed to provide automation to google.  But I simply wanted chrome to be inside our VFP form using stock VFP commands and function plus utilizing WinAPIs.


I knew for a fact beforehand that this one is not as simple as placing other app inside our form like what I have shown in http://sandstorm36.blogspot.com/2014/05/3rd-party-apps-from-within-our-forms.html

For among its obstacles is that Chrome browser creates several processes when you open it.  This can be seen via Task Manager so using its process ID (PID) is not a good way to go.  Although originally that is where my first few thoughts went.


Next is Chrome might open several tabs depending on your local setting if you set it to remember the previous tabs opened when you close it, via "Continue where you left off".

Further, Google Chrome Browser is an entirely separate beast, so to speak.  After I found the way to bring it inside our VFP form, belatedly I realize that it does not respect Windows Styles so while we can put it inside our VFP form, it is somewhat useless to me unless I can hide its TitleBar to disallow its further movements.

Maybe you will ask me, what is the purpose of placing chrome inside VFP form? Honestly, I do not have a use on my end as I never needed this nor the IE browser inside our form due to very slow internet services here in this country where I am working.  But I have to satiate my curiosity for if I don't, then it will bug me now and then when the thoughts interfere on my day to day job.  I simply have to satisfy my curiosity on how this can be done; so I can move on with new lines of thought. Or else I will be stuck thinking about this now and then.

Anyway, it is fun finding a way to bring it inside VFP form.  Plus I learn new WinAPIs in the process just to make this possible.

I am shelving this now and will work on real things that are important.  I am making this post so if anyone got an interest to even just find out how this can be done and maybe tries to enhance this, then this can maybe serve as your starting point.  Codes are below:

Public oForm
oForm = Createobject('form1')
oForm.Show()

Define Class form1 As Form
      Height = 600
      Width = 900
      Caption = "Chrome Inside VFP Form"
      Desktop = .T.
      AutoCenter = .T.

      Procedure Load
            Declare Integer FindWindow In user32;
                  STRING lpClassName, String lpWindowName

            Declare Integer GetActiveWindow  In user32

            Declare Integer GetWindow In user32 Integer HWnd, Integer wFlag

            Declare Integer GetWindowLong In User32 Integer HWnd, Integer nIndex

            Declare Integer GetWindowTextLength In user32 Integer HWnd

            Declare Integer IsWindow In user32 Integer HWnd

            Declare Integer IsWindowVisible In user32 Integer HWnd

            Declare Integer GetWindowText In user32;
                  INTEGER HWnd, String @lpString, Integer cch

            Declare Integer ShellExecute In shell32.Dll ;
                  INTEGER hndWin, ;
                  STRING cAction, ;
                  STRING cFileName, ;
                  STRING cParams, ;
                  STRING cDir, ;
                  INTEGER nShowWin

            Declare Integer SetWindowLong In user32 Integer HWnd,;
                  INTEGER nIndex, Integer dwNewLong

            Declare Integer SetWindowPos In user32;
                  INTEGER HWnd,;
                  INTEGER hWndInsertAfter,;
                  INTEGER x,;
                  INTEGER Y,;
                  INTEGER cx,;
                  INTEGER cy,;
                  INTEGER uFlags

            Declare Integer SetParent In user32;
                  INTEGER hWndChild,;
                  INTEGER hWndNewParent

            Declare Sleep In kernel32 Integer

            #Define GW_HWNDFIRST  0
            #Define GW_HWNDLAST   1
            #Define GW_HWNDNEXT   2
      Endproc

      Procedure KeyPress
            Lparameters nKeyCode, nCtrlShift
            If nKeyCode = 27
                  Thisform.Release
            Endif
      Endproc

      Procedure Init
            Local lcURL
            lcURL = 'http://www.clipartpanda.com/clipart_images/fox-clip-art-2605413 --new-window '
            ShellExecute(0,'open','chrome.exe',m.lcURL,'',1)
            Activate Window (Thisform.Name)
            Sleep(1000)
            Thisform.SearchProcess()
      Endproc

      Procedure SearchProcess()
            With This
                  Local hWinActive, hWindow, lcWinText, lSuccess, lnMove
                  hWinActive = GetActiveWindow()
                  hWindow = -1
                  lSuccess = .F.
                  Do While hWindow <> GetWindow(hWinActive, GW_HWNDLAST)
                        If hWindow = -1
                              hWindow = GetWindow(hWinActive, GW_HWNDFIRST)
                        Else
                              hWindow = GetWindow(hWindow, GW_HWNDNEXT)
                        Endif

                        If IsWindow(hWindow) <> 0 And IsWindowVisible(hWindow) <> 0;
                                    And GetWindowTextLength(hWindow) > 0
                              lcWinText = .GetWinText(hWindow)
                              nHwnd = FindWindow(Null, m.lcWinText)
                              If 'Google Chrome' $ m.lcWinText
                                    lSuccess = .T.
                                    Exit
                              Endif
                        Endif
                  Enddo
                  If m.lSuccess
                        lnStyle = GetWindowLong(m.nHwnd, -6)
                        SetWindowLong(m.nHwnd, -16, Bitxor(lnStyle, 0x00400000))

                        * The trick to hide the pesky built-in titlebar of chrome is to
                        * move chrome up that it won't display the titlebar anymore.  Since there is a difference in settings
                        * on each of our machines such as in my end, my bookmarks are shown, then here is my setting
                        * Adjust it based on your end settings of Chrome

                        lnMove = 100

                        With This
                              SetParent(m.nHwnd,.HWnd)
                              SetWindowPos(m.nHwnd, 1, 0, -m.lnMove, .Width, .Height + m.lnMove,0x0040)
                        Endwith
                  Endif
            Endwith

      Endproc

      Function  GetWinText(hWindow)
            Local lnBufsize, lcBuffer
            lnBufsize = 1024
            lcBuffer = Repli(Chr(0), lnBufsize)
            lnBufsize = GetWindowText(hWindow, @lcBuffer, lnBufsize)
            Return  Iif(lnBufsize=0, "", Left(lcBuffer,lnBufsize))
      Endfunc

Enddefine


 ===== 

As a guide on how I achieve this, it involves forcefully opening a URL to Chrome via ShellExecute(), cycling to all active windows (Chrome, VFP, Explorer, etc.) until it finds Chrome, and getting its corresponding window handle so we can put a hold on to it.

As for Chrome, depending on the speed of the connection, you may get the internal caption of the newly opened Tab or if it is slow, you will get "New Tab - Google Chrome".  In which case, to ensure that no matter what we can know if it is chrome is to look for the word Google Chrome as that will always be a part of its internal caption.

Aside from the purpose of my usage of those APIs above, I posted the above as I deem it is also good for interested readers to study each APIs I used there as that may come handy on other needs as well.

Cheers!


Firefox Inside VFP Form

$
0
0
Nothing new here, I used the same approach in the Chrome one but worked on FireFox itself this time.  This is to see if my suspicion that the reason for WinAPIs' inability to control the titlebar of Chrome is because it really has its own titlebar.

Also, this is based on advise of Bernard Bout to try this on FireFox.  This works on my end since I am using an older version of FF which is 12.  The titlebar is hidden properly.  I have not tried it though on newer version of FF as I don't download any being I prefer Chrome.  So it is up to you guys to test this on those newer version.


Anyway, here are the codes, with the same approach I used on Chrome and some changes on Windows Styles:

Public oForm
oForm = Createobject('form1')
oForm.Show()

Define Class form1 As Form
      Height = 600
      Width = 900
      Caption = "Firefox Inside VFP Form"
      Desktop = .T.
      AutoCenter = .T.

      Procedure Load
            Declare Integer FindWindow In user32;
                  STRING lpClassName, String lpWindowName

            Declare Integer GetActiveWindow  In user32

            Declare Integer GetWindow In user32 Integer HWnd, Integer wFlag

            Declare Integer GetWindowLong In User32 Integer HWnd, Integer nIndex

            Declare Integer GetWindowTextLength In user32 Integer HWnd

            Declare Integer IsWindow In user32 Integer HWnd

            Declare Integer IsWindowVisible In user32 Integer HWnd

            Declare Integer GetWindowText In user32;
                  INTEGER HWnd, String @lpString, Integer cch

            Declare Integer ShellExecute In shell32.Dll ;
                  INTEGER hndWin, ;
                  STRING cAction, ;
                  STRING cFileName, ;
                  STRING cParams, ;
                  STRING cDir, ;
                  INTEGER nShowWin

            Declare Integer SetWindowLong In user32 Integer HWnd,;
                  INTEGER nIndex, Integer dwNewLong

            Declare Integer SetWindowPos In user32;
                  INTEGER HWnd,;
                  INTEGER hWndInsertAfter,;
                  INTEGER x,;
                  INTEGER Y,;
                  INTEGER cx,;
                  INTEGER cy,;
                  INTEGER uFlags

            Declare Integer SetParent In user32;
                  INTEGER hWndChild,;
                  INTEGER hWndNewParent

            Declare Sleep In kernel32 Integer

            #Define GW_HWNDFIRST  0
            #Define GW_HWNDLAST   1
            #Define GW_HWNDNEXT   2
      Endproc

      Procedure KeyPress
            Lparameters nKeyCode, nCtrlShift
            If nKeyCode = 27
                  Thisform.Release
            Endif
      Endproc

      Procedure Init
            Local lcURL
            lcURL = 'http://www.clipartpanda.com/clipart_images/fox-clip-art-2605413'
            ShellExecute(0,'open','firefox.exe',m.lcURL,'',1)
            Activate Window (Thisform.Name)
            Sleep(1000)
            Thisform.SearchProcess()
      Endproc

      Procedure SearchProcess()
            With This
                  Local hWinActive, hWindow, lcWinText
                  hWinActive = GetActiveWindow()
                  hWindow = -1

                  Do While hWindow <> GetWindow(hWinActive, GW_HWNDLAST)
                        If hWindow = -1
                              hWindow = GetWindow(hWinActive, GW_HWNDFIRST)
                        Else
                              hWindow = GetWindow(hWindow, GW_HWNDNEXT)
                        Endif

                        If IsWindow(hWindow) <> 0 And IsWindowVisible(hWindow) <> 0;
                                    And GetWindowTextLength(hWindow) > 0
                              lcWinText = .GetWinText(hWindow)
                              nHwnd = FindWindow(Null, m.lcWinText)
                              If 'Mozilla Firefox' $ m.lcWinText
                                          Exit
                              Endif
                        Endif
                  Enddo
                  lnStyle = GetWindowLong(m.nHwnd, -6)
                  SetWindowLong(m.nHwnd, -16, Bitxor(lnStyle, 0x00400000))

                  With This
                        SetParent(m.nHwnd,.HWnd)
                        SetWindowPos(m.nHwnd, 1, 0, 0, .Width, .Height,0x0040)
                  Endwith
            Endwith

      Endproc

      Function  GetWinText(hWindow)
            Local lnBufsize, lcBuffer
            lnBufsize = 1024
            lcBuffer = Repli(Chr(0), lnBufsize)
            lnBufsize = GetWindowText(hWindow, @lcBuffer, lnBufsize)
            Return  Iif(lnBufsize=0, "", Left(lcBuffer,lnBufsize))
      Endfunc

Enddefine

The same approach can be used on any other browser or any other 3rd party app that cannot be easily reached via automation.  Though I would prefer automation if it is available as it gives us more control over the object.

For Each...EndFor GOTCHA!!!!

$
0
0
Working on a new concept for my Fake Tabs need, I decided to create a container class that will act as a page tab.  Then to emulate a pageframe, I control the position of the tab on each instances of the class.  Then pile those up on top of each other.  So if I need say 5 tabs, then that will be 5 of that container class that is piled on top of each other.  Switching tabs is done via switching Zorder().

With this fake tab, I can change colors per tab or use the same color but with different shades.  With the tab width auto-adjusting based on the caption I put into it plus its Font Name and Size, I am happy with the result.

While those can be achieved as well on the native VFP tab via turning Themes=.F. and TabStyle = 1 (Non-justified) properties of a pageframe object, I like to have a uniquely looking tab for my use and not that Windows 98 looking tabs when I need a colored tab; so the extra work on my end to achieve it.

Everything works to my satisfaction until I decided to add a sort of highlighter in the form of a dotted transparent shape to act as an indicator of the active tab.


While testing that highlighter though, I noticed that it sometimes does not seem to follow my instruction on the FOR EACH....ENDFOR  for there are times (not always) that two dotted shapes remain.  For you to help understand this, here are my codes:

For Each loObject In This.Parent.Objects FoxObject
      lnAbsLeft = m.lnLeft + loObject.Left + loObject._nTabLeft
      If Between(laObj(3),m.lnAbsLeft , m.lnAbsLeft + loObject._nTabWidth)
            loObject.ZOrder(0)
            loObject.shpActiveTab.Visible = .T.
      Else
            loObject.shpActiveTab.Visible = .F.
      Endif
Next

And a variation:

For Each loObject In This.Parent.Objects FoxObject
      loObject.shpActiveTab.Visible = .F.
      lnAbsLeft = m.lnLeft + loObject.Left + loObject._nTabLeft
      If Between(laObj(3),m.lnAbsLeft , m.lnAbsLeft + loObject._nTabWidth)
            loObject.ZOrder(0)
            loObject.shpActiveTab.Visible = .T.
      Endif
Next

And we expect that that shpActive (dotted shape) will only show once, right?  On a case to case basis, it does not:


Gotcha

I realized only a while ago prior to this post what is causing this, and while this may not be a bug, it is not documented either on my VFP help (at least on my stock copy of it).

The gotcha is that FOR EACH...ENDFOR relies on the z-order of objects subject to the loop.  It starts reading from the bottom of the z-order going to top.  So by changing the z-order of the objects while in the loop, then that switch may cause it to shortcircuit where the FOR EACH reading "again" the one that may have already passed the previous loop and is then put on top or in front of the z-order;  and that the one that is not read yet that goes below the z-order may no longer be read.

So the solution to my problem is simply allowing the loop to complete before applying new Zorder():

For Each loObject In This.Parent.Objects FoxObject
      lnAbsLeft = m.lnLeft + loObject.Left + loObject._nTabLeft
      loObject.shpActiveTab.Visible = .F.
      If Between(laObj(3),m.lnAbsLeft , m.lnAbsLeft + loObject._nTabWidth)
            loActive = loObject
            loObject.shpActiveTab.Visible = .T.
      Endif
Next
*Change Zorder outside of the loop
loActive.ZOrder(0)

For your awareness!


Fake Checkbox on Grid

$
0
0
As most of my posts, this one also comes from a need of a member inside Foxite forum.  His desire is to have a uniquely looking checkbox and so my advice is to utilize two images representing checkboxes, one that is ticked and the other not ticked.  Then to manipulate viewing of the image via  DynamicCurrentControl.


In my mind, even without testing yet, I believe it will work good.  But I was notified later that that trick requires two clicks and so I tested and it did needs two clicks as follows:

1st click - to set focus and activate the cell
2nd click onwards - actual toggling of the underlying logical field

And I agree that if we can get around the issue of the first click, then that would be better.  However, I cannot find a property or event  to activate a cell using click and then perform click on the image as well in one go.  But believing  there is always a way, I tried other ideas.  And as I found a way, then here it is again, maybe you'll need something like this:


loTest = Createobject("Sample")
loTest.Show(1)

Define Class Sample As Form
      Caption = 'DynamicCurrentControl'

      Add Object grid1 As Grid With ColumnCount = 2


      Procedure Load
      Create Cursor junk (x C(1), Y l)
      For lnloop = 1 To 26
            Insert Into junk Values (Chr(m.lnloop+64),.F.)
      Next
      Go Top
      Endproc

      Procedure grid1.Init
      Local lcImage, lcFile
      With This
            .RecordSourceType= 1
            .RecordSource='junk'
            .Column1.ControlSource = 'junk.x'

            With .Column2
                  .ControlSource='junk.y'
                  .AddObject("ImgChk","MyImage")
                  .AddObject("ImgNoChk","MyImage")
                  .Width = 24
                  With .imgChk
TEXT TO lcImage NOSHOW
/9j/4AAQSkZJRgABAAEAYABgAAD//gAfTEVBRCBUZWNobm9sb2dpZXMgSW5jLiBWMS4wMQD/2wCEAAgFBgcGBQgHBgcJCAgJDBQNDAsLDBgREg4UHRkeHhwZHBsgJC4nICIrIhscKDYoKy8xMzQzHyY4PDgyPC4yMzEBCAkJDAoMFw0NFzEhHCExMTExMTExMTExMTExMTExMTExMTExMTExMTExMTExMTExMTExMTExMTExMTExMTExMf/EAaIAAAEFAQEBAQEBAAAAAAAAAAABAgMEBQYHCAkKCwEAAwEBAQEBAQEBAQAAAAAAAAECAwQFBgcICQoLEAACAQMDAgQDBQUEBAAAAX0BAgMABBEFEiExQQYTUWEHInEUMoGRoQgjQrHBFVLR8CQzYnKCCQoWFxgZGiUmJygpKjQ1Njc4OTpDREVGR0hJSlNUVVZXWFlaY2RlZmdoaWpzdHV2d3h5eoOEhYaHiImKkpOUlZaXmJmaoqOkpaanqKmqsrO0tba3uLm6wsPExcbHyMnK0tPU1dbX2Nna4eLj5OXm5+jp6vHy8/T19vf4+foRAAIBAgQEAwQHBQQEAAECdwABAgMRBAUhMQYSQVEHYXETIjKBCBRCkaGxwQkjM1LwFWJy0QoWJDThJfEXGBkaJicoKSo1Njc4OTpDREVGR0hJSlNUVVZXWFlaY2RlZmdoaWpzdHV2d3h5eoKDhIWGh4iJipKTlJWWl5iZmqKjpKWmp6ipqrKztLW2t7i5usLDxMXGx8jJytLT1NXW19jZ2uLj5OXm5+jp6vLz9PX29/j5+v/AABEIABIAFQMBEQACEQEDEQH/2gAMAwEAAhEDEQA/APVvEmtatD4it9H0eTTbXNm93Nc36O6gB0QKArLgkt1J/CgDG8WeJfE3hG0gudUv9DuJLiUQ21lbWM3n3TkgBEzKcHnqRge/AIB0HgG81DU9BXU9UvY7ia8dnEUKBYrYAlfLU4y2CDliTk9MDFAGP4o03TtZ8ef2VrKo1neaDNG6swXP7+M5B9QcEHscUAcz8NPAd/p3iy41Txjqw1IaODaaM00wf9318zGeODtHoc+goA7X4UEHwDppUggmYgjoR5z80Abmr6LpWsJGur6ZZ36xElBdQJKEJ643A4oAzP8AhCPCf/Qr6J/4L4v/AImgDft4YraCOC3iSGGNQqRooVVA6AAdBQB//9k=
ENDTEXT
                        lcFile = Addbs(Getenv("TEMP"))+"check"
                        Strtofile(Strconv(m.lcImage,14),m.lcFile)
                        .Picture = m.lcFile
                        .Visible = .T.
                  Endwith

                  With .imgNoChk
TEXT TO lcImage NOSHOW
/9j/4AAQSkZJRgABAQEAYABgAAD//gAfTEVBRCBUZWNobm9sb2dpZXMgSW5jLiBWMS4wMQD/2wBDAAIBAQIBAQICAgICAgICAwUDAwMDAwYEBAMFBwYHBwcGBwcICQsJCAgKCAcHCg0KCgsMDAwMBwkODw0MDgsMDAz/2wBDAQICAgMDAwYDAwYMCAcIDAwMDAwMDAwMDAwMDAwMDAwMDAwMDAwMDAwMDAwMDAwMDAwMDAwMDAwMDAwMDAwMDAz/wAARCAASABUDASIAAhEBAxEB/8QAHwAAAQUBAQEBAQEAAAAAAAAAAAECAwQFBgcICQoL/8QAtRAAAgEDAwIEAwUFBAQAAAF9AQIDAAQRBRIhMUEGE1FhByJxFDKBkaEII0KxwRVS0fAkM2JyggkKFhcYGRolJicoKSo0NTY3ODk6Q0RFRkdISUpTVFVWV1hZWmNkZWZnaGlqc3R1dnd4eXqDhIWGh4iJipKTlJWWl5iZmqKjpKWmp6ipqrKztLW2t7i5usLDxMXGx8jJytLT1NXW19jZ2uHi4+Tl5ufo6erx8vP09fb3+Pn6/8QAHwEAAwEBAQEBAQEBAQAAAAAAAAECAwQFBgcICQoL/8QAtREAAgECBAQDBAcFBAQAAQJ3AAECAxEEBSExBhJBUQdhcRMiMoEIFEKRobHBCSMzUvAVYnLRChYkNOEl8RcYGRomJygpKjU2Nzg5OkNERUZHSElKU1RVVldYWVpjZGVmZ2hpanN0dXZ3eHl6goOEhYaHiImKkpOUlZaXmJmaoqOkpaanqKmqsrO0tba3uLm6wsPExcbHyMnK0tPU1dbX2Nna4uPk5ebn6Onq8vP09fb3+Pn6/9oADAMBAAIRAxEAPwD9Wv2jfj18Xbn9rzwx8HvhIfh3o9/eeEb7xhqmseLdOvdSiEMN5aWqW0UNtPblHdpyxkeQ8KcRnFUte0X9s3wb4e1DWINe/Z98Wz6ZBPdR+H9L8Kanp95rJRWZLWG6udVaGCWXGxXlXy42cFtyKQYPFHiKx8Nf8Fo/DD6jeW2nxT/BjVkjaaVIlkI1zTmblvvAbl5/hLgfxV9Ot8RvDynB17Rgdu7/AI/Ys4zjP3umePrQB59+xR+0Te/tPfsueDPHGqWmj2Ora5YZ1G3027kuLO3vIpZILiOKV0XeqyxOMjcOOGddrsV5L/wRVu7d/wDgmX8N5EuY/Jlm1ho5IfuTL/bF7hh9RRQB7Z8Wv2ZPht+0rZafB8Rvh74H8fwaXdXDWcfiTQrXVUtCWYExidHCEgAHbjOBXB/8Osv2Yv8Ao3L4D/8AhAaT/wDGKKKAPbPAvhnTfBnhbTdJ0fT7HSdK06zigtbOzgSC3to1BCokaAKqgdAAAKKKKAP/2Q==
ENDTEXT
                        lcFile = Addbs(Getenv("TEMP"))+"Nocheck"
                        Strtofile(Strconv(m.lcImage,14),m.lcFile)
                        .Picture = m.lcFile
                        .Visible = .T.
                  Endwith

                  .DynamicCurrentControl='IIF(junk.y=.F.,[ImgNoChk],[ImgChk])'
                  .Sparse = .F.

            Endwith
            .RowHeight = 22
      Endwith
      Endproc

      Procedure grid1.AfterRowColChange
      Lparameters nColIndex
      If This.ActiveColumn = 2
            Replace Y With !Y In junk
      Endif

Enddefine

Define Class MyImage As Image
      Procedure Click
      Replace Y With !Y In junk
      Endproc
Enddefine


The final trick on the single click need, if you have not noticed, lies on usage of the AfterRowColChange event of the grid. Hope this helps!  Cheers!

On-Screen Keyboard for POS

$
0
0
On a POS system, since we are dealing with touch screens, then we need to have a keyboard on screen so our users, in addition to barcode scanning, can do other more works.  And for that what we normally do is create our own on-screen keyboards.  Or utilize the built-in OSK that comes along with Windows that can be simply called via RUN /N OSK.EXE.

What is more appealing though is to make said OSK appear to be really a part of our form and this can be done via embedding said OSK.EXE within our form.  However, embedding Microsoft's OSK is easier said than done.

Good news then, here is an alternative to Microsoft's OSK (On-Screen Keyboard) that can be easily embedded inside our forms.  Further good news is that this one is free: http://freevirtualkeyboard.com/

For the embedding need inside our form, I will refer you to the codes  graciously shared to us by a good friend Vilhelm-Ion Praisach.  In addition to the tricks he used there, I like his subtle touch here on the usage of a timer instead of my SLEEP() way on the embedding 3rd party apps within our forms blog.


Codes:

* Author:  Vilhelm-Ion Praisach
* Date: March 4, 2015

Declare Integer ShellExecute In shell32 Integer hWindow, String lpOperation, String lpFile, String lpParameters, String lpDirectory, Integer nShowCmd
Declare Integer SetParent In User32 Integer HWnd, Integer ParenthWnd
Declare Integer FindWindow In user32 String lpClassName, String lpWindowName
Declare Integer GetWindowLong In user32 Integer HWnd, Integer nIndex
Declare Integer SetWindowLong In user32 Integer HWnd, Integer nIndex, Integer dwNewLong
Declare Integer SetFocus In user32 Integer
Declare Integer SetWindowPos In user32 INTEGER HWnd, INTEGER hWndInsertAfter, INTEGER x, INTEGER Y, INTEGER cx, INTEGER cy, INTEGER uFlags
Declare Integer GetWindowThreadProcessId in Win32API Integer hWnd, Integer @lpdwProcessId
Declare Integer OpenProcess in Win32API Integer dwDesiredAccess, Integer bInheritHandle, Integer dwProcessID
Declare Integer TerminateProcess in Win32API Integer hProcess, Integer uExitCode

Clear
Public ofrm
ofrm = Createobject("MyForm")
ofrm.Show()

Define Class MyForm As Form
      Width = 900
      Height=430
      hOsk = 0
      nOskHeight = 200
      ShowWindow = 2
      Desktop = .T.
      AutoCenter = .T.
      Add Object txt As TextBox
      Add Object cmd As CommandButton With Top = 50 , Caption = "\<Click"
      Add Object tmr As Timer With Interval = 300
     
      Procedure Load
            = ShellExecute(0, "open", "freevk.exe", "", "", 1) && this should be inside among your VFP paths
      ENDPROC
     
      Procedure tmr.Timer
            LOCAL nStyle
            ThisForm.hOsk = FindWindow (.Null., "Free Virtual Keyboard (www.FreeVirtualKeyboard.com)")
            nStyle = GetWindowLong (ThisForm.hOsk, -16)
            SetWindowLong (ThisForm.hOsk, -16, Bitset(m.nStyle,30)) && set child
            SetWindowLong (ThisForm.hOsk, -16, Bitclear(m.nStyle,31)) && remove popup
            SetParent(ThisForm.hOsk, Thisform.HWnd) && change parent
            SetWindowLong (ThisForm.hOsk, -16, BITAND(m.nStyle,2^32-1-0xCF0000)) && remove the title bar
            SetWindowPos(ThisForm.hOsk, 0, 0, ThisForm.Height-ThisForm.nOskHeight,ThisForm.width, ThisForm.nOskHeight,  0x0020+0x0040) && move to the bottom of the form and show

            This.Enabled = .F.
            SetFocus(Thisform.HWnd) && set focus to the VFP window
      ENDPROC
      PROCEDURE destroy
            LOCAL lnProcessID
            lnProcessID = 0       
            GetWindowThreadProcessId(ThisForm.hOsk, @lnProcessID)       
            TerminateProcess(OpenProcess(1, 1, m.lnProcessID) , 0)
      ENDPROC
      PROCEDURE resize
            SetWindowPos(ThisForm.hOsk, 0, 0, ThisForm.Height-ThisForm.nOskHeight,ThisForm.width, ThisForm.nOskHeight,  0x0020+0x0040+0x0010) && move to the bottom of the form, and show, and SWP_NOACTIVATE
      ENDPROC

Enddefine


Hope this helps!  Cheers!

Windows OSK inside our Form

$
0
0
Have shared earlier an embedding technique of a 3rd-party app called Virtual Keyboard with codes of  Vilhelm-lon Praisach (with his permission) because while I don't need it, others who used to frequent my blog may.

But since I wanted to find out also how to embed the nasty elusive built-in On-Screen Keyboard (OSK) of Windows which yesterday gave me a lot of frustration as surprisingly it is harder to control than said Free Virtual Keyboard, gleaming new codes from Vilhelm I decided to renew my failed attempts on how it can be done.  Sometimes though when I do try to control things I do not need yet like this one, in the midst of it I wish I should have simply banged my head on the table; for again it seems I am unnecessarily stressing myself  on something I myself do not need or used (yet).

Anyhow, while finding ways like this sometimes makes my blood pressure go up due to frustrations, in the end when I find a way, I felt a bit of contentment as that is another understanding (to an extent) of these somewhat elusive WinAPIs.  Anyway, I have yet fully understood these things and just relies on my observations and trials and errors.

After adopting some technique and codes used by Vilhelm I am able to successfully embed OSK within our form under XP OS.  However, trying the same codes inside Windows 7 renews my frustration as said OS does not respect the settings I have done earlier.

Finally, here are the codes that work on both XP and Windows 7 (32-bit, I do not have 64-bit to test it to):

* OSK inside VFP Form XP/Win 7 32-bit

Declare Integer FindWindow In user32;
      STRING lpClassName, String lpWindowName

Declare Integer GetWindowLong In User32 Integer HWndInteger nIndex

Declare Integer ShellExecute In shell32.Dll ;
      INTEGER hndWin, ;
      STRING cAction, ;
      STRING cFileName, ;
      STRING cParams, ;
      STRING cDir, ;
      INTEGER nShowWin

Declare Integer SetWindowLong In user32 Integer HWnd,;
      INTEGER nIndex, Integer dwNewLong

Declare Integer SetWindowPos In user32;
      INTEGER HWnd,;
      INTEGER hWndInsertAfter,;
      INTEGER x,;
      INTEGER Y,;
      INTEGER cx,;
      INTEGER cy,;
      INTEGER uFlags

Declare Integer SetParent In user32;
      INTEGER hWndChild,;
      INTEGER hWndNewParent

Declare Integer SetFocus In user32 Integer

Clear

Public oForm
oForm = Createobject('form1')
oForm.Show()

Define Class form1 As Form
      Height = 400
      Width = 900
      Caption = "OSK Inside VFP Form"
      Desktop = .T.
      AutoCenter = .T.

      Add Object text1 As TextBox With;
            top = 20, Left = 10, Width = 100, Height = 28

      Add Object tmr As Timer With Interval = 100

      Procedure KeyPress
            Lparameters nKeyCode, nCtrlShift
            If nKeyCode = 27
                  Thisform.Release
            Endif
      Endproc

      Procedure Load
            ShellExecute(0,'open','osk.exe','','',1)
      Endproc

      Procedure tmr.Timer
            Local nOSKHeight
            nOSKHeight = 250  && initial OSK height
            nHwnd = FindWindow(Null,'On-Screen Keyboard')
            lnStyle = GetWindowLong(m.nHwnd, -16)
            SetWindowLong (m.nHwnd, -16, Bitset(m.lnStyle,30))  && remove menu
            SetWindowLong(m.nHwnd, -16, Bitxor(m.lnStyle, 0xCF0000))
           
            * In Windows7, OSK is not positioned properly until you do this first and do another below later
            SetWindowPos(m.nHwnd, 0, 0, Thisform.Height-m.nOSKHeight,Thisform.Width, m.nOSKHeight,  0x0020)
           
            SetParent(m.nHwnd,Thisform.HWnd)
            SetWindowPos(m.nHwnd, 0, 0, Thisform.Height-m.nOSKHeight,Thisform.Width+10, m.nOSKHeight,  0x0020)
            This.Enabled = .F.
            SetFocus(Thisform.HWnd)
      Endproc
Enddefine

Some difference in attitude:

  • on XP, it can be resized on-the-ply; on Window 7 it is fixed size
  • on XP  version of OSK,  there is no word suggestion; while on Windows 7 there is 
Here are images showing the difference in appearance and attitude on both OS mentioned:


Afterthought:

If you noticed on the final SetWindowPos, I added 10.  That is because Windows 7 has thicker border than XP and that is used to counter or compensate for the thickness difference.  You can perform an OS() function to determine whether that extra 10 can be added or not.   

Hope this and Vilhelm's will help you on your on screen keyboard needs.  Cheers!


Give Hope, Give a Hand, Change Lives

$
0
0
Inbetween my work, foxite forum, posting some humor to make some people laugh at FB, I was surprised when someone suddenly popped me up on my mobile phone yesterday via fb messenger.  Said someone introduced herself as a friend of my niece on my cousin and that she is trying hard to reach her, was not able to on that moment and searched for a relative instead in the hope of reaching her outright, then found my fb account and popped me.

The purpose of the message, I later realized is about her desire to include her friend (my  niece) among the possible list of recipients of a so-called LN-4 Foundation.

Being polite and as her claim is to help my cousin's niece, I answered some of her questions.  But when she began asking me about some personal info pertaining to my relative, I was suddenly on guard.

In these days of hardships, there are new scams now and then in my country (my Mom has been a victim herself once of a dugo-dugo gang scammers where a material portion of her savings were lost); so while in conversation, I began the process of slowly prying out some information which can help me decide whether the concern is genuine or just a scam.  And at the same time using the power of internet, I took a short investigation.

In just a few minutes, I found the Philippine-based organization she mentioned to me, reached the persons listed as officials there, briefly skimmed some posts on their wall (they have FB account), and decided to seek permission to post their cause here.


So what is this about?


This is about spreading further the news about Ellen Meadows Prosthetic Hand Foundation, a non-profit organization spearheaded by Ernie Meadows and the late Margie Meadows who passed away late last year.

Brief Histories

LN-4 Foundation

LN-4 is actually "For Ellen, reversed), the daughter of industrial designer Ernie Meadows and his late wife, Margie.  Ellen died young at an early age of 18 in a vehicular accident.  The purpose of the Foundation is to provide, as a gift, prosthetic hands for those who were injured by landmines, work accidents, electricity, acts of violence or a congenital condition; in different parts of the worlds. 

For a more thorough reading, I will refer you to these:

http://www.ln-4.org/history.lasso
http://goldbeachrotary.com/service-projects/world-projects/ln-4
http://hosted.verticalresponse.com/406331/101a24c69f/1763500573/1b134b7498/
http://wallstreetrotary.org/ln-4-prosthetic-hand-project/


LN-4 Foundation Philippines

Began in September of 2014 in the country and is currently based in Panay Island.  It is spearheaded by these people as Ambassadors to the Philippines:

  • Grace Cabato, the LN-4 Director for Team Philippines 
  • husband Rey Cabato, the Deputy-Under Director and Expediter
  • Rease Wold, the Deputy Director 
  • wife Liza Wold as Secretary
  • Marlone & Agustin Cartagena 


Prior to LN-4 establishment in the Philippines, Rease Wold, a retired US Air Force personnel, married to Liza Wold, a former Child and Youth Program Assistant at Fort Lewis Army Base Child Care Center; was originally approached by a friend to help supervise a Non-Government Relief operation for the victims of Yolanda Typhoon under the name PRAY (Provincial Relief Aide for Yolanda), a name concocted by Rease Wold himself.  And with the help of the Philippine Army, some more institutions and volunteers in the Philippines, said non-profit organization were able to reach desolate areas requiring the much needed help.

During said time is when they met The LN-4 Director for Philippines, Grace Cabato.   Grace (was a charge nurse in the Medical ICU at the Queens Medical Central in Honolulu) and Rey Cabato (Retired US Navy) who have their roots in Dao, Capiz, now residing in Hawaii; learned that their baranggay is being overlooked on the relief mission for Yolanda victims.  So they decided to personally fly back to Philippines as volunteers themselves to hand out relief goods.  And that is the time the Cabatos and the Wolds path crossed.  Later, LN-4 Foundation Philippines was born and started providing joy to countless citizens who needs those prosthetic hands.

Here is a brief article about this:  http://panaynewsphilippines.com/2014/11/16/give-hope-give-a-hand/


Psychological Impact

I was once in a vehicular accident myself.  In my teens, I used to ride a Yamaha Enduro 125 motorcycle and said accident broke my femur (thigh bone) in half.  Finding myself lying in the asphalt road and feeling something is wrong in my feet, I lifted it up and my knee fell to my chest. My thigh was broken in half.  Being a realistic person, I prepared myself outright to a possible amputation.  Luckily it never reached that stage that while my femur's growth is somewhat distorted inside, I can walk now without a noticeable limp (though in reality the right foot is a bit longer now than the other).

During the time of recuperation, I became so irritated.  I got angry for nothing and is constantly on a high voice.  When after my mom cried (I am still single back then), I realized my mistakes, apologized and explained to her the psychological impact of losing something that we normally don't pay much attention to; like simple act of walking.  Heck, I dreamt constantly during those times that I am running and it felt sooo good that I'll wake up with a smile on my lips; then the reality hits me and I am back to my sour but more controlled mood!  So in a way, I can empathize to the hardships that our fellow feel without one or two hands.

And in this regard is why I wanted desperately to write this up here, the main purpose is for my readers to be made aware that there is this organization who are tirelessly and selflessly giving away free prosthetic hands for those in need. And like what their slogan says, they are giving hopes to those who need a hand, literally.


How to Reach LN-4 Foundation Philippines

What is more admirable is that said organization is requesting anyone to help them find recipients for their artificial hands.  So if you have someone in mind, then there are two ways to reach them:

- Via Facebook: https://www.facebook.com/groups/692740154144827/
- Via Mobile:  contact their secretary/webmaster, Liza Wold, at (0917) 301-9101 or (0918) 657-1021

Let us all help spread the news!  While this write-up is focused on the Philippine sector, please check again their main webpage at http://www.ln-4.org, to know if now your country is currently on their list. Anyone who knows of someone who needs a prosthetic hand, feel free to contact the above.


Special Thanks to Menaya Samar who upon learning of this foundation, has done her best to to reach my cousin's niece; braving a possible distrust on the good intention upon doing so. As well as to her friend Jing Faren Leonardo, who shared her the news and asked her to think of someone who might need a prosthetic hand.  Special thanks also to countless volunteers working behind the scene on LN-4 Foundation and some more non-profit organizations.  More power to you guys!


"Be thankful for what you have. You have no idea how many people would love to have what you got"


 Michelle Villaflor Amante

xBox (a Textbox Control class)

$
0
0
Release 4

  • Made the appearance cleaner by imitating a plain textbox so when you resize on form during design time, you will see the borders cleanly
  • Fixed seeding initial Value via PEM
  • Added seeding via ExtraValue property which displays the correct Value counterpart  
  • Used inherent Picture property for alternate icon.  Removed icon property as that is just a waste of extra unneeded property. Although on form, when a picture for icon is selected, the icon image is shown tiled on the class
  • Added ControlSource, PasswordChar, ReadOnly, FontBold and FontItalic properties

Release 3

Color Toggling on Enabling/Disabling the class - Fixed

Seeding the class via .Value does not perform an AutoComp resulting to .ExtraValue giving a wrong result. Fixed that. However, seeding values to other xBoxes on the form with each having an AutoComp feature enabled short-circuits it; as each tries to perform an AutoComp search during when values are changed.

Solution is to ensure that only the active xBox will perform an AutoComp search. So now, you can do something like this: 

*xBox1's InterActiveChange
*  where search is made and seeding other xBoxes as we type
thisform.xBox2.Value = field2
thisform.xBox3.Value = field3
thisform.xBox4.Value = field6


And only xBox1 will perform the AutoComp search and the others will simply receive the values. Anyway, there is no need for the record pointer to change on those 3 others.

Caveat:

When seeding an xBox where you want it to perform an AutoComp search, then you have to ensure it is the active object in the form. Something like this:

Thisform.xBox1.SetFocus
Thisform.xBox1.Value = 'Whatever'

Say like when you open another form where you want to seed an xBox some value from the calling form and later would also like to reflect the .ExtraValue back, then you have to set focus onto it before the value is seeded.

If you are not after the .ExtraValue though and is only after the .Value, then no need to SetFocus on the class.


Here is the link for the latest class and demo form: https://dl.dropboxusercontent.com/u/15025358/xbox_demo.rar

Enjoy!

Release 2:

What's new:

- Added a protected property named Release just for the sole purpose of differentiating between releases (if any more release will happen in the future)

- Added Caption property.  This is what gets shown inside the box when there is no value


- Added markers 3 & 4 which are magnifying glasses


- Added Icon property so any of you can customize the marker.  This icon image will be prioritized by the class over the default marker, if any.  If an image to be used as marker is included in the project, then you do not need to include fullpath.  If it is not, you need to include fullpath


- Moved the hover effect from within the textbox object to the class itself.  I was thinking of creating another property to optionally disable this hover effect should the user do not want it.  But then I realized all you need to do to disable this is to ensure that BorderEnter and BorderLeave are of the same RGB().

- Added KeyPress Event


=====

Release 1

What is xBox?  This is a textbox with curvature effect which is a descendant of ssTextBox container class for my ssUltimate library.  Basically, this class is cleaner since I now use a control class type here as against a container class for ssTextBox.

Actually, I decided to create this new control class yesterday because of a post I saw inside Foxite about a textbox with auto-complete.  So I fooled around with codes but before being able to post a way, I found out that our good friend Vilhelm-Ion Praisach has already beaten me in posting there how it can be done.  :)

Another reason why I decided to work on this new class is because I saw that it will be faster for users of my ERP app to have something like that auto-complete instead of using a combobox.  And thus, this new class is born.

Why, you may say, instead of enhancing the old ssTextbox, I created this new one?  Because I am not overly satisfied with that old one being I designed it as a container class before.  Control classes are cleaner in a sense that objects inside won't be shown in the form.  Here are images comparing a container class and a control class when inside a form:

Container Class


 Control Class


However, its strength is also its weakness in the sense that you won't be able to directly reach the objects of the control class from within the instance of the class inside a form as those are somewhat hidden.  For reaching a control class, the developer has to create properties and methods in the class itself; which is what we have here (see new features).

Forwarded Features from ssTextBox:

  • Curvature
  • Marker (check marks)
  • Others (I forgot, just check my blog entry for that)

    New features:
    • As mentioned, being a control class type then it is cleaner
    • Added hover effect on border with curvature (although if you have my latest ssClasses as well I shared recently inside Foxite, then this is now also included there).  This is affected by .BorderEnter and .BorderLeave properties of the class, the values you need to put there are RGB() of your taste.
    • AutoComplete Feature (Optional) - If you wanted this class to perform an auto-complete, then you should use these two properties:
      • AutoCompSource - is the record source (cursor or table) subject to seeking
      • AutoCompField - is the fieldname of the recordsource where search would be performed by the class


    The class takes advantage of a structural index tag of the same name as the AutoCompField, if there is, and will use SEEK().  If the table does not have that necessary index tag, then it will switch to using LOCATE.

    • Since my goal in creating this new class is to replace some of my comboboxes for faster searching, then I have to have the Combobox' ability to return two possible values at a time.  But it is comparably easier though to return any values from any fields of the AutoCompSource with xBox via the ExtraField and ExtraValue properties. 
    Shown below is the comparison between a combobox and xBox:
      ComboboxxBox
      DisplayValueValue
      ValueExtraValue
      How come I have not swapped the above?  That is because in combobox, no matter where you get the value, what will be shown on the object is always the DisplayValue.  So in the case of xBox, that is the same.  
      In combobox, value can come from any column, be it visible or not (see http://sandstorm36.blogspot.com/2012/08/combobox-tricks-part-i.html).  In xBox, ExtraValue then is the same, it can come from any other field aside from the field being displayed (Value).  This ExtraValue is dependent on the  ExtraField property of the class (see demo project).  
      • When AutoComplete feature is used, then when a match is found, it is shown on the current forecolor we set.  When a match is not found, then forecolor turns into red as an added visual indicator


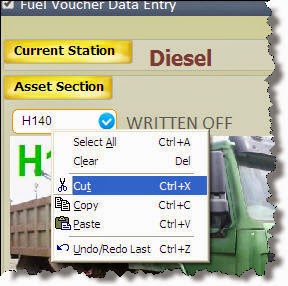
      • Right-click context (just usual stuff like cut, copy, paste, select all, Clear, Undo/Redo last action; maybe I will add more in the future)
      • InteractiveChange Event is added
      • Basic properties like FontSize, FontName, ForeColor, Format, and InputMask are added.  Will add others soon but for now, those are what I basically need

      I hope that you will find this useful on your end as well.  I welcome suggestions to improve this further.  Like I said, this is created only yesterday and I have added features based only on what I need right now.  For my subscribers, then this will be part of ssUltimate library.  I will update you all soon.

      Cheers!

      ButtonX Class - ssUltimate Library

      $
      0
      0
      As much as I do not want to post here classes of ssUltimate that I retained strictly for my subscribers, since I no longer explain what changes I do now and then inside the library, then they have no way of knowing those; and therefore they are under utilizing it or does not know how to fully utilize it to their maximum advantage.

      And so I decided that from now on, I will slowly post here those classes that remains hidden for others to serve as a guide for my Subscribers.  And to make it clear, those that are strictly for them will always have a suffix of - ssUltimate Library.

      What is ButtonX?

      ButtonX is my final button class which is the predecessor of ssButton series.  Any new features on a button class is done on this one.  This class is highly customizable based on the taste of the developer where you can change the position of the caption, change the theme, its color, etc.

      What is new here?

      It has better themes than its predecessors. Here are some of the themes, all with 6 colors to choose from, all with hover effect with color changing


      Going Flat

      Since flat seems to be the trend these days, I gave it new capability to become just like that, flat,  via the existing parameters plus 2 new parameters, i.e., nShpBackColor and nShpCurvature

      To make it absolutely flat, all the user needs to do is to change the nTheme parameter into 0. Once you turn nTheme into zero, then it will ignore the existing built-in themes I designed as seen on the above image.  It will make those invisible.


      But as you can see, the border is still there.  To turn it into really flat, turn nLineSpecialEffect paramater into 3, and that will remove the borders of the button:


      But flat is not simply about removing the borders of the button.  If you look at the trend these days, there are round buttons, etc.  To make this easy, I added as mentioned two new parameters to help give that look, nShpBackColor and nShpCurvature

      nShpBackColor = is the color of the new shape for the flat look.
      nShpCurvature = is the curvature of that shape, default is 90.  This gives you the ability to make it round, not too much, etc.

      On default curvature of 90


      Change curvature, your choice.  Here is how it looks with 15 value


      In addition to the above, there are 3 colors it does when it is on flatlook appearance:

      a.  The color you set for the shape
      b.  The color for disabled buttonX which is somewhat of lighter shade than the color you set
      c.  Hover color, lighter shade that is slightly different than the disabled color

      Mini-X

      There is this 3rd additional parameter I have also added here called LWithX.  By default, it is set to .F..  When you turn this into .T., then when a buttonX gets disabled, aside from the effect on the caption and color, it will have a small round red X on the left topmost corner of the button like this:


      Flat-look on TitleBarX

      If you are not aware of what  TitleBarX is, then take a look at this link http://sandstorm36.blogspot.com/2015/01/titlebarx-class.html .

      Now, assuming you already knew about that class which is among those I shared that is part of ssUltimate library, ButtonX can now work on that easy (only on theme 0).  That as you change the color of your objects in your form, ButtonX can now follow with a shade of your choice.

      To make it work better with TitleBarX, then instead of setting up the button inside the class itself, you can do that inside TitleBarX'_SwapColor Method like this:

      DoDefault()
      Thisform.BackColor = This._shade(-.20)
      Local lnWhite, lnShade1
      lnShade1 = This._shade(-.35)
      lnWhite = Rgb(255,255,255)
      With Thisform.PageFrame1.Page1
            .BackColor = This._shade(-.18)
            .contSearch.BackColor = This._shade(-.42)
            .cmdAdd._settings('\<Add',0,6,'new1.bmp',2,'Create a new borrower',.T.,,,13,m.lnWhite,,,3,m.lnShade1)
            .cmdEdit._settings('\<Edit',0,6,'openx.bmp',2,'Edit details of an existing borrower!',.T.,,,13,m.lnWhite,,,3,m.lnShade1)
      ENDWITH


      The last one showing the red X marker when the buttons are toggled as Disabled.  So when you use this last parameter, when you toggle the buttons, aside from the colors, you can easily spot the disabled one via that red X.

      I will update soon my subscribers with ssUltimate after I finished posting guides on the latest inside the library.  One is about the new ConX class, the latest class I made to work with TitleBarX as well.  This ConX class can work as a container, a button, and a pageframe tab, your choice.


      This also works hand-in-hand with TitleBarX giving you a flat look interface.


      Dang, the colors on my laptop is really different than the external LCD, LOL!  Anyway, that is one point of ssUltimate especially the recent classes I made.  To give users the capability to choose whatever color that suits their eyes, individually, anytime.  And considering that every screen have different color balancing, then that fixes also the color difference that looks good on one but not on others.

      Needless to say, depending on your taste, xButton can give you cool looking embossed buttons or  flat with curvature of your choice.

      So what is ssUltimate Library?  Well all I can say is this library will give your app something that is not looking like a standard VFP app.  When I first created my very first library _sandstorm36, my plan is to terraform VFP Forms.  :)

      ConX & ContainerX Classes - ssUltimate Library

      $
      0
      0
      ContainerX Class - Brief Introduction  

      When I first started working on ssUltimate Library, I decided to create a counterpart of ssContainer there I called ContainerX.  This basically is just like ssContainer but with cleaner codes and better looking themes as the themes I used in ButtonX is also being utilized here.

      In _ssClasses library, the image of ssContainer is dependent on your usage of ssButton for it is ssButton that takes care of generating the images.  So when you don't use ssButton, then ssContainer will also be useless as the images it needs won't be there, and you will get a big X which is the default appearance of an image object without any picture attached.

      In ssUltimate, I created a separate custom class for the images extraction, and both classes has that custom class inside.  So those two, while still working with the same images, no longer relies with each other.


      ConX Class, the difference


      However, the design of ContainerX is into flashy embossed type.  So after I created TitleBarX, I decided to try giving my apps a flat look and while ContainerX fits just fine with my design concepts, I wanted then a really flat interface.  And so the creation of ConX (since I already used ContainerX, that is the simplest name that came to my mind to differentiate the two).

      At first, all I wanted is something flat that looks cool  that can change color on the whim especially if it is tied up to TitleBarX.  Later, I decided to give this a capability to be turned into a button.  Still later, I decided to re-use  said class for my pageframe need.  It eventually became a 3-in-1 class that can be turned/utilized as plain container, a button, or a page tab.

      Here is what it looks like, but first the parameters:
      • cCaption = The caption of the container, class tab section will auto-adjust based on parameters cCaption, cFontName and nFontSize
      • nColor = is the RGB() of your choice (or a shade using TitleBarX)
      • cFontName = font name
      • nFontSize = Font Size
      • nTabLeft = Whether you want the tab section at leftmost (default is 0), or you want it moved somewhere to the right (useful when making this as tab to create an illusion of a pageframe)
      • lInside = logical, whether you want an inside border or not (looks good for tabs, auto for tabs)
      • nCurve = curvature of the shape below tab section
      • nInBackColor = RGB() for that inside border/shape
      • lShowActive = Logical, whether you want to show a dotted shape as outline of the caption, useful in tabs
      • lNoTabs = When you are in the pageframe mode and you want only the active tab to be shown or not
      • cForeColor = Caption ForeColor 
      There is another property that I left via using PEM called _nfunction.  By default, its value is 0 or class will be treated as a Container.  When you give this a value of 1, then class will become a button where it can receive a click event plus hover effect.  Turning the value into 3 will change the class' usage as a pagetab of a pageframe, sort of.

      As a container (_nfuntion = 0)

      Nothing much to be explained.  It is a container, plain and simple, with just a flashy caption and appearance.  It is where you can put objects inside it.

      If you noticed on the above, I use titleBarX' power of shading there.


      As a button (_nfunction = 1)

      As mentioned, it will now receive a click event plus implement hover effect on mouse enter and leave.  Once it is turned as a button, then whatever objects you put inside is no longer individually clickable, only the class itself.


      As a page tab (_nfunction = 3)

      Now this is the trickiest usage of the class.  If you want to use this as a sort of pageframe, then you need to turn _nFunction = 3.  Not only that, if you want to mimic a pageframe, then you have to do this:

      1.  Create an empty container on form, make the borderwitdh zero and make it transparent.
      2.  For each tab, you use one ConX class.  So you can design your supposed to be tab outside, placing objects inside each container, and once you are done, you can put all those ConX classes inside the empty transparent container, one on top of the other.

      Now, for me not to get confused on which tab I am working on, I change the backcolor of each (aside from the caption I set where I can place the name of the class as guide during developing time).  And when I need to reach the other conX to change something there, then I cycle through each via clicking Sent to Back button; until the one I want to work with goes on top.

      3. You have to estimate the tab position of each conX based on the caption you will be placing via nTabLeft parameter, so each tabs can be seen.

      4.  Decide whether to show all tabs all at once or only the active one via lNoTab parameter.  When you turn this into .T., then only the active tab can be seen at a time.  If the value is .F., then all tabs will be shown.

      5.  You can choose to have different colored tabs or just a single color tab, your choice.  For a single color tab, then like I mentioned, this works hand-in-hand as well with TitleBarX so you can let TitleBarX give it a shade of its selected color.

      6.  You can optionally show the Active Tab (it will be encased with dotted lines) via lShowActive parameter

      Here is how it looks with only the active tab being shown at a time.  This image shows it being utilized as a tab and as a container (Finalize section).


      Shown also above is SwitchX, ButtonX and otCalendar classes.

      And how it looks like when all tabs are shown, varying colors: http://sandstorm36.blogspot.com.au/2015/02/for-eachendfor-gotcha.html


      Forgive me for the colors I chose there, eventually I changed it into a single color that follows TitleBarX:

      Well, I guess with this one, I will make a sample for my subscribers to see how to utilize said class based on those 3 _nFunction.  Especially on turning it into a pageframe, sort of.


      Other more posts to come  for ssUltimate Library later are SwitchX, OptionSwitchX, ScrollTime, and StickyX; to name a few.

      SwitchX & OptionSwitchX - ssUltimate Library

      $
      0
      0
      What is SwitchX?

      SwitchX is a descendant of ssSwitch.  It is my attempt to replace the old looking native checkbox of VFP.  Especially in this era of mobile devices, then something like this can be seen on android, Windows or IOS phones, where you can switch it on and off.


      What is new?

      Better designs, more themes.  I kept changing my designs over and over again where I retain the ones I like and replaces others I don't.  So definitely, some of the themes here will still change in the future; but you can safely guess which I will change later (the ugly ones, what I have shown below will be retained as those are among my fave).

      Three new parameters, cToolTipText, nFontSize, cFontName.  I believe the names I used are self-explanatory enough.


      What is OptionSwitchX

      Well, this is the counterpart of the native OptionGroup of VFP.  I re-used here SwitchX so both will be receiving the same themes.

      What is New?

      Two new parameters,  cFontName, nFontSize 


      OptionSwitchX Limition:

      OptionSwitchX can only have a max 12 switches.  The reason for that is in my end, I rarely or never yet needs an OptionSwitchX or even the native OptionGroup with 12 buttons/switch.  So I believe it is more than enough.  Anyway, the codes are included when I release this library to the Subscribers so they can add more if they want.


      Themes, where are those coming from?

      All of those themes I design using Photoshop.  So you can do the same.  The themes images are stored on a separate class named ImagesSwitch so you can add more themes if you want.  Since I embed the images for extraction converting those into Base64 Binary, then you can use the Binary Block Breaker tool I shared last time for that need:  http://sandstorm36.blogspot.com/2012/06/binary-block-breaker-tool.html

      Here are some of the themes, there are 20 themes right now:


      Of course, the actual images are clearer and cleaner than the above because clarity is lost on conversion to a jpg format, and lost further during upload as those I believed were reduced further for faster viewing via web.  Plus the image is resized smaller.


      EditX Class - ssUltimate Library

      $
      0
      0
      This is the version of the sseditbox of ssClasses in this library.  This is a dropdown edit box which I designed to save space on form.  It appears as an ordinary textbox on form that is designed for long input such as those for memo fields.

      While an editbox can contain more than the visible section via scrolling up and down, there might be situations where your form is so full of controls that there is not enough room to fit a decent editbox there; and this is where this becomes useful.

      This class is built of two section, the one shown in the form that looks like a plain textbox, and a dropdown section that appears when you are typing and you reached the end of the textbox portion or when you click on the down arrow icon.

      Once it looses focus, it auto-hides the dropdown section, just like a combobox.   Well yes, you can think of this just like a combobox but instead of lists of selection for the dropdown section, it has a plain editbox there.

      What is New?

       - Cleaner codes versus ssEditBox, as I removed a lot of properties on PEM that is no longer needed in this version.

      - Now it is a Control class

      - _DropOnFocus property.  This is what triggers the class to show dropdown section outright or not on GotFocus event of the class.  By default this has a value of .T. or auto-drop on focus.

      When dropdown section is visible, it always position the mouse pointer to the last entry so you can continue where you left off.

      When you turn its value to .F., then dropdown will be triggered either when you reach the end of the textbox or when you click on the dropdown arrow.

      _ndropwidth - Default value of 0 or adjust based on the width of your edtX (same width). If you want the dropdown section to be wider for better encoding, then set the desired width here.

      _ndropheight - Default value of 0 or a height of 138.  Adjust your desired height if you want taller dropdown section.

      Showing two class instance on form, one is made wider than the other


      Running on default values (auto-width based on class width on form, height of 138)


      Dropdown section size controlled, _ndropwidth = 500 and _ndropheight = 200


      - FontName - font name of the textbox section
      - FontSize = font size of the textbox section
      - _FontName = font name of the dropdown section
      - _FontSize = font size of the dropdown section 

      The above 4 properties will give the developer the ability to control the font name and sizes for both the textbox and dropdown sections.  Now you can make the font for the dropdown section bigger than the textbox section


       or the reverse, your choice.  Helps rheumatic eyes problem a bit :)


      Miscellaneous info:

      Double-click quickly erase previous entry.

      On runtime, the height of EditX control class will auto-adjust based on the font name and size you set for the textbox section.  The width is retained based on the width you set during design time.

      If you noticed on some of the images, the lower arrow of the dropdown editbox is sometimes partially hidden.  Fixed that last night.

      Unlike my other classes, the various properties and features of this class can be set straight using PEM (Other tab).


      TitleBarX - ssUltimate Library

      $
      0
      0
      This is among those I shared to public from this library http://sandstorm36.blogspot.com/2015/01/titlebarx-class.html.  For lack of enthusiastic response (my own view) to this inside the forum, then I decided again that when I adjust this, only the subscribers will have those.

      Anyway, the source code is there on the shared release so anyone can adjust the shared copy to something what I have done after that; if they like to have the same.

      What is New?

      Nothing much.  Right now what I have added deals with aesthetics

      Better color palette image (at least based on my personal taste) for color picker


      Removed spinner for choosing shade of current color selection.  Now, all you need to do after clicking a color which signifies a color selection, is to use the mouse scroll (while on palette) to make the selected color dimmer or lighter.

      Changed icon for color picker into a more appealing one (again per my personal taste)

      Added a shape for the captions and turned captions into white.  The width of the shape is based on which is longer between the main and sub captions.


      Added also a shape on controlbox


      Changed default value of _noClock property as .T. (Now clock is hidden by default)

      I have been working on different looks of a title bar from ssTitleBar to ssClose and CloseX series and the reason I am preferring this now over those is because of:

      • its capability to pick any color for the form and create varying shades of it on form's objects
      • its capability to change color on-the-ply
      • we can use the section set as titlebar for other things by placing any objects there as shown in this image

      Future enhancements I will do on this class will only be available again to my Subscribers (and selected people).

      xBox - ssUltimate Subscribers

      $
      0
      0
      What is New?

      Added ProgrammaticChange event.  Now we can perform, say a new SQL SELECT based on the class'Value or ExtraValue, as we select on the dropdown grid via either arrow keys or mouse click.   Or update related objects on the form based on this class, as we select.  This event is what gets fired when selecting via dropdown grid.

      Fixed bug on Enter key suddenly changing value onto a different one via updating _SearchKeys with what is selected on dropdown and moving SelStart position at the end as well.


      Fixed bug on the class retaining old _SearchKeys value even when we totally remove the previous entry via backspace or delete keys


      For a more thorough learning of this class, see other features and updates of the class up to the point of the shared version:  http://sandstorm36.blogspot.com.au/2015/02/xbox-with-popup-grid.html


      Unmentioned Trick

      One of the things I forgot to mention is that you can return combined field values as its single Value. I do that on my end like this:


      Now, when you want to use one of those multiple values it returned, then you can utilize GETWORDNUM().

      That capability is on both the shared and per Subscriber versions.

      Combobox with Filtering Capability

      $
      0
      0
      Here is a combobox that can filter the items in the dropdown list based on what has been typed so far.  It is a good candidate for replacing my xBox class if you don't need a Quickfill/Auto-Complete or if you wanted only a dropdown that is being filtered.  This uses SQL SELECT as RowSourceType.


      Before running the sample, there are two things you should know outright:
      • Double-clicking on the textbox portion will clear DisplayValue and will restore the original SQL SELECT
      • I used Ctrl+Enter to trigger the dropdown section
      Here are the codes:


      * Combobox with Filtering Capability
      * Jun Tangunan, June 29, 2015

      Public oForm
      oForm = Createobject("cboFilter")
      oForm.Show()

      Define Class cboFilter As Form
            DoCreate = .T.
            Caption = "Combobox with Filtering Capability"
            ShowTips = .T.
            AutoCenter = .T.

            Add Object combo1 As ComboBox With ;
                  Left = 30, ;
                  Top = 20, ;
                  Width = 300,;
                  ToolTipText = 'Press Ctrl+End to show dropdown list, double-click to Clear'

            Add Object command1 As CommandButton With;
                  left = 30,;
                  Top = 80,;
                  Caption = 'Show Values',;
                  Width = 100

            Procedure Load
                  Close Databases All
                  Use Addbs(Home(2))+'Data\Customer'Alias customer Shared
            Endproc

            Procedure combo1.Init
                  This.AddProperty('MySQL','Select company,country, cust_id from customer '+;
                        'order by 1 into cursor junkcust nofilter')
                  This.AddProperty('BaseSQL',This.MySQL)

                  With This
                        .RowSourceType= 3
                        .RowSource = This.MySQL
                        .BoundColumn = 3
                        .BoundTo=.T.
                        .ColumnCount= 2
                        .ColumnWidths = '300,100'
                  Endwith
            Endproc

            Procedure combo1.KeyPress
                  Lparameters nKeyCode, nShiftAltCtrl
                  Do Case
                        Case nKeyCode = 10  && Ctrl+Enter
                              Keyboard "{ALT+DNARROW}"Plain Clear
                        Case Inlist(nKeyCode,24,5,13)
                        Otherwise
                              This.MySQL = 'Select company,country, cust_id from customer WHERE  '+;
                                    'ALLTRIM(this.DisplayValue) $ company order by 1 into cursor junkcust nofilter'
                              This.RowSource = This.MySQL
                  Endcase
            Endproc

            Procedure combo1.DropDown
                  If Empty(This.DisplayValue)
                        This.RowSource = This.BaseSQL
                  Else
                        This.RowSource = This.MySQL
                  Endif
            Endproc

            Procedure combo1.DblClick
                  This.DisplayValue=''
                  This.RowSource=This.BaseSQL
            Endproc

            Procedure command1.Click
                  Messagebox('Value      :'+Thisform.combo1.Value+Chr(13)+;
                        'DisplayValue: '+Thisform.combo1.DisplayValue)
            Endproc

      Enddefine


      Comparison:

      xBox - Basic
      • Has Quickfill or Auto-Complete (optional)
      • If dropdown feature is used (_SetGrid), then dropdown grid will appear immediately and gets filtered as you type (optional)
      • It can have a combination of Quickfill and dropdown
      • It can return two values from two fields, i.e., Value which is what is on the textbox and ExtraValue which is hidden 
      Combobox with Filter
      • I have not introduced Quickfill here though I believe it can be done
      • Dropdown list won't appear as you type like xBox.  You have to either press Ctrl+Enter or click on the dropdown arrow for you to see the dropdown list with filtered result.  
      • Sample shows how we can return two values based on Value and DisplayValue properties (via BoundTo and BoundColumn).
      • Shows how to hide the last column where Value comes from.  It  is easy enough.  Just don't include it on the ColumnCount.
      Anyway, some users may not be comfortable with the way xBox works, that is why I show here how a Combobox can be used that will work like an xBox.

      Cheers! 


      ExcelPivot (ssUltimate)

      $
      0
      0
      Got an extra time today so I decided to move ssExcelPivot class of ssClasses to ssUltimate library which housed my latest classes.  And so this entry here.

      What is New?

      Basically, it is ssExcelPivot with some changes as follows:

      • Changed the buttons to native VFP commandbutton 
      • Changed ssSwitch into SwitchX for better appearance
      • Changed optSwitch into OptionSwitchX for better appearance
      • Added Miscellaneous section that allows user to interactively change some properties.  More options than ssExcelPivot
      • Added Show/Hide Grand Total capability 
      • Added ToolTips on all SwitchX and OptionSwitchX to make things more informative
      • Rearranged objects, to make the popup form cleaner


      What is this Class?

      Briefly, it is designed to allow developer to create any valid pivot report of their choosing from either a table or cursor straight into Excel; even without a single knowledge on Excel automation. As long as you know how to create a cursor, then you are done.

      This class allows developer to set a fixed report as can be seen here.  Those are the default arrangements and fields I set for that specific report; via codes.  However, interactively, any user can still change the pivot report by dragging and dropping fields onto their respective section such as columns, values, rows and filters; before sending those over to excel.

      What they cannot do interactively here is word-wrapping which I retain purely via codes for memo fields converted into character type (Excel do not accept a memo field).  Word wrapping is done by suffixing the field with colon and the width, e.g., Remarks:30, meaning Field Remarks will be of 30 width inside an excel cell and if content is long, it will be word-wrapped.

      Anyway, just check the old ssExcelPivot posts if you are curious as to what others this class can do.


      Viewing all 160 articles
      Browse latest View live